Curtains (formally called draperies) are one of the top home furnishings that’s installed improperly. No offense, but chances are your curtains are hung wrong too. Let’s chat about the common misconceptions when installing curtain rods, how to remedy them, and our formula for installing them like a pro.
Common Misconceptions
01 | Curtains should hug the window casing
Ninety-nine percent of the time, your curtains should be installed on the wall surrounding the window. Why? Because they make your windows look smaller in comparison to the rest of the room. You’re also blocking quite a bit of natural light from the windows.
There is one exception to this rule, though; if the window is tight between two walls, like in a dormer or small powder room, then you can install your hardware directly to the casing.
While curtains and draperies are sometimes purely functional, you don’t have to sacrifice aesthetic in the process. On the other hand, you may have your draperies just for looks, and in that case, you definitely don’t want to sleep on installing them the right way.
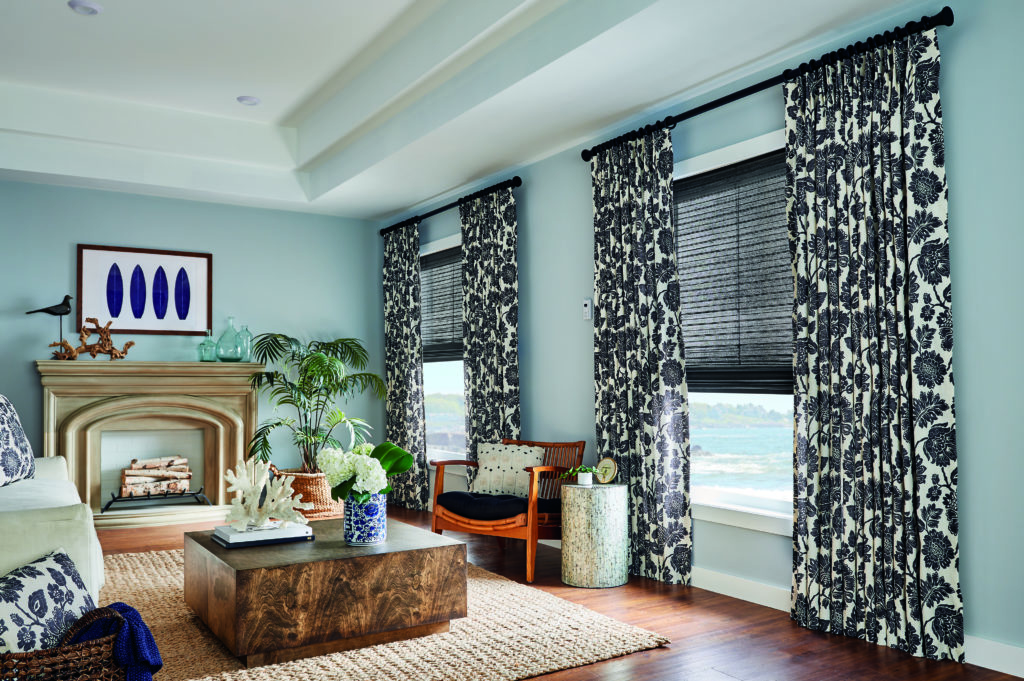
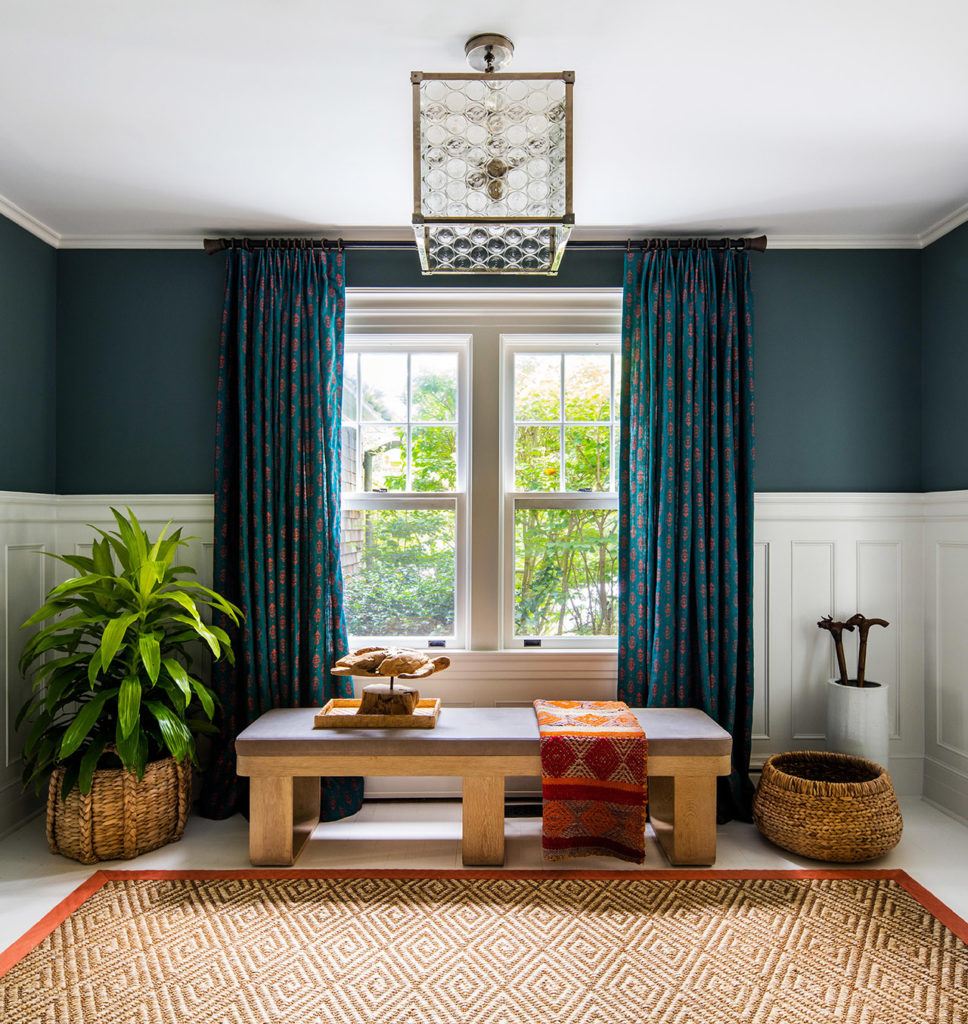
Remedy: Install your brackets 12”, give or take, from each side of the window’s millwork. This will give your windows a grander appearance and you’ll get better visibility when the curtains are stacked to the side.
Are you on the market for beautiful curtain rods and drapery hardware? View the online catalog for Kirsch and let us know when you’re ready to order.
02 | You need to hang your curtains at the top of the window
Just as it’s minimizing to install curtain rods the width of the window, mounting them as high as the window is bound to make your room appear out of proportion too. To show you what I mean, take a look at the rooms below. Three of these are installed properly, the other three are not. Can you guess which ones?
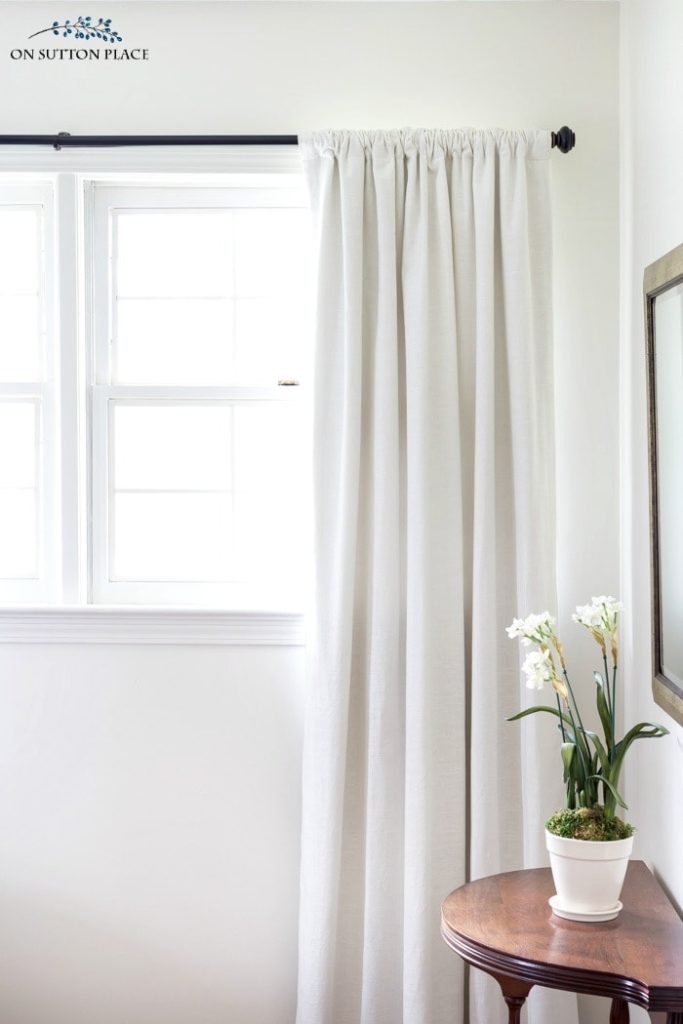
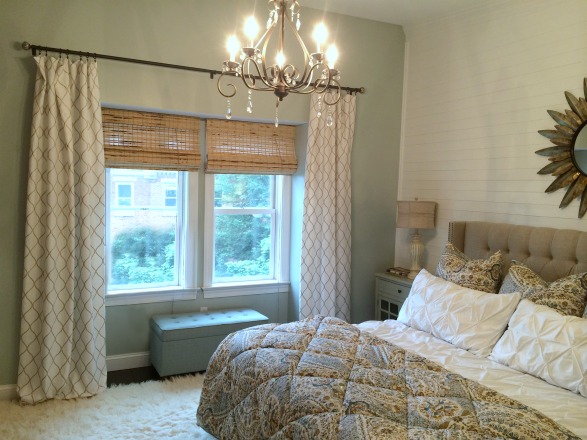
If you guess photos 1, 3, and 5 show curtain rods installed improperly, you’d be correct! The tell-tale sign is how crowded the windows look. When curtains and draperies are installed surrounding the window like this, the window becomes a negative focal point in the room. The ceiling looks to high, the walls to big, and the windows way smaller than they should be. Don’t you agree?
Schedule a complimentary measure and estimate to ensure you have the right dimensions for your draperies.
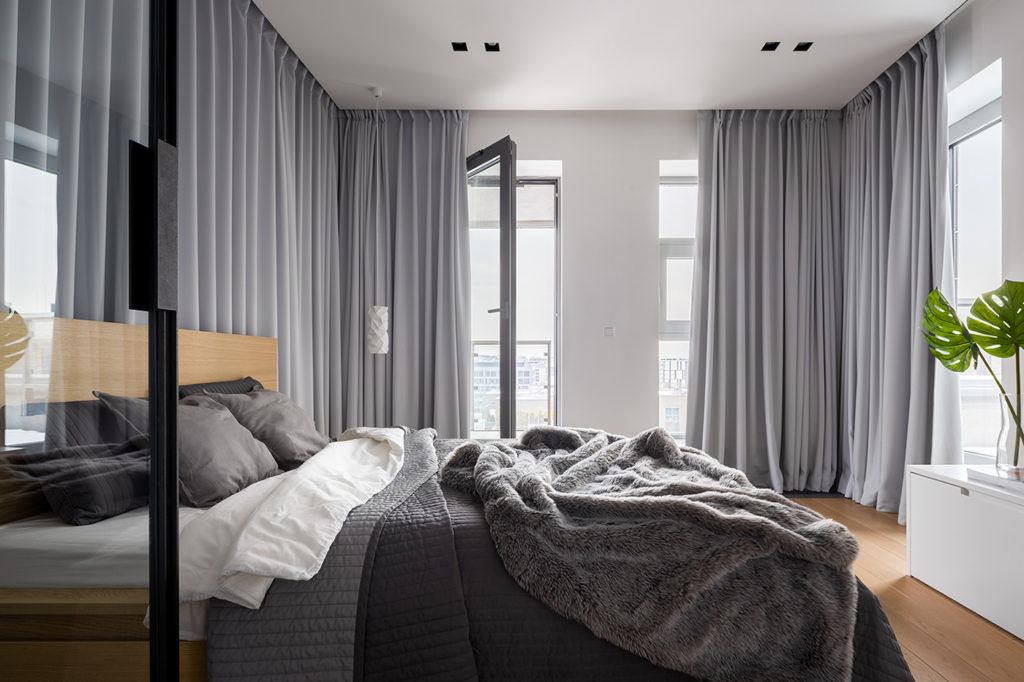
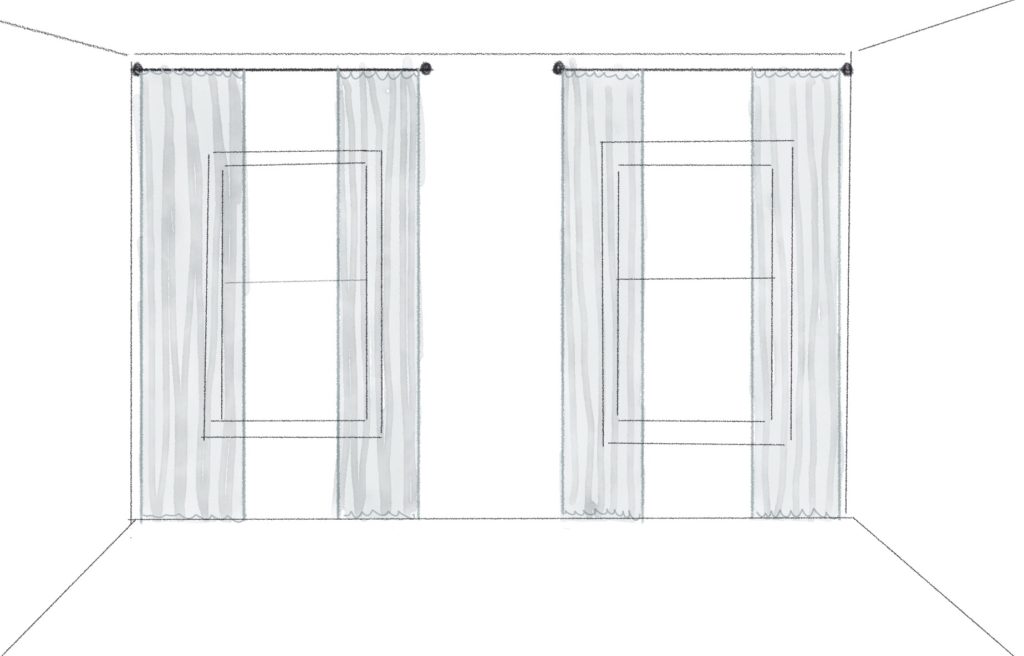
Remedy: When your ceilings and window casing header are within 12” of one another, mount your curtain rods just below the ceiling. Your room will appear taller and more curated. In certain scenarios, like cathedral ceilings, you’ll just want to add about 6-8” from the top of the casing. In addition to height, this will balance the wall. A small window on a large wall can get lost, but with the right draperies, it’s just right.
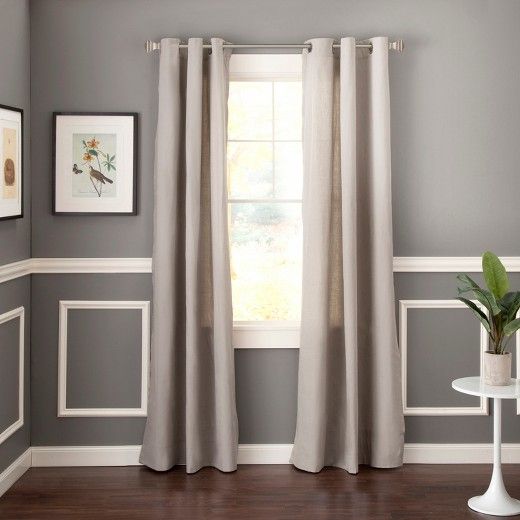
03 | Curtains should be the exact width of the window when closed
Especially now that we’ve discussed curtain rods’ proper placement outside the width of the window, draperies themselves need to be wider than you think. The only exception is when you want decorative panels simply flanking the window. Otherwise, make sure your fabric is wide enough that it doesn’t appear stretched out when drawn closed. Take a look at the window treatments below; the difference is night and day.
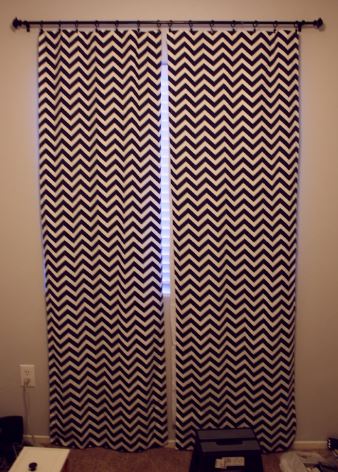
INCORRECT
These curtain panels are not wide enough for the size of the window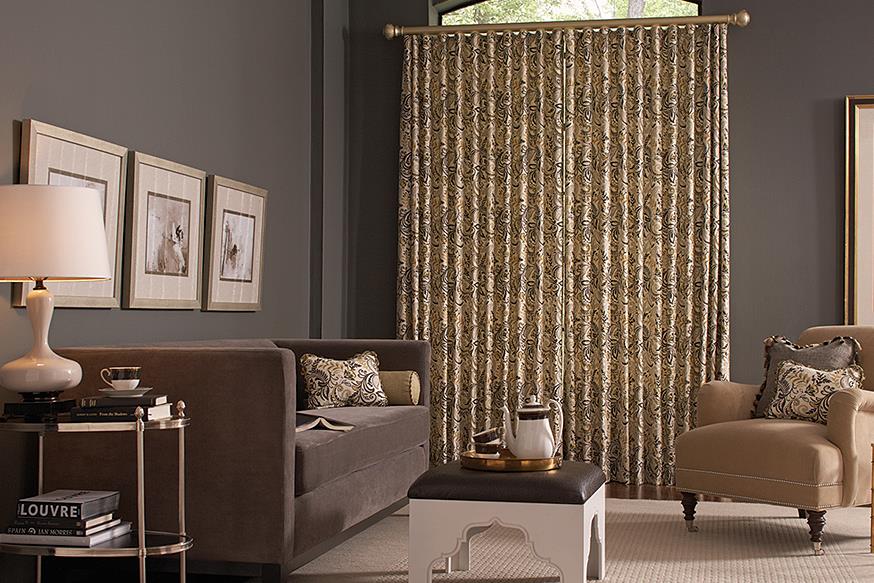
CORRECT
Draperies should have ripples or pleats when done properly
In the first image, the fabric is even smaller than the width of the window. Once major concern of this is insufficient light blockage. When you need a room completely dark, this will just not do.
Remedy: As window treatment experts, we suggest doubling the width at minimum of your fabric. By increasing fabric, you ensure that the light will be covered up as needed. As far as aesthetics go, doubling your fabric adds a level of curation and intentionality. When this is done, your draperies will have ripples or folds all the time, not just when they’re drawn open.
Hassle-Free Installation Method
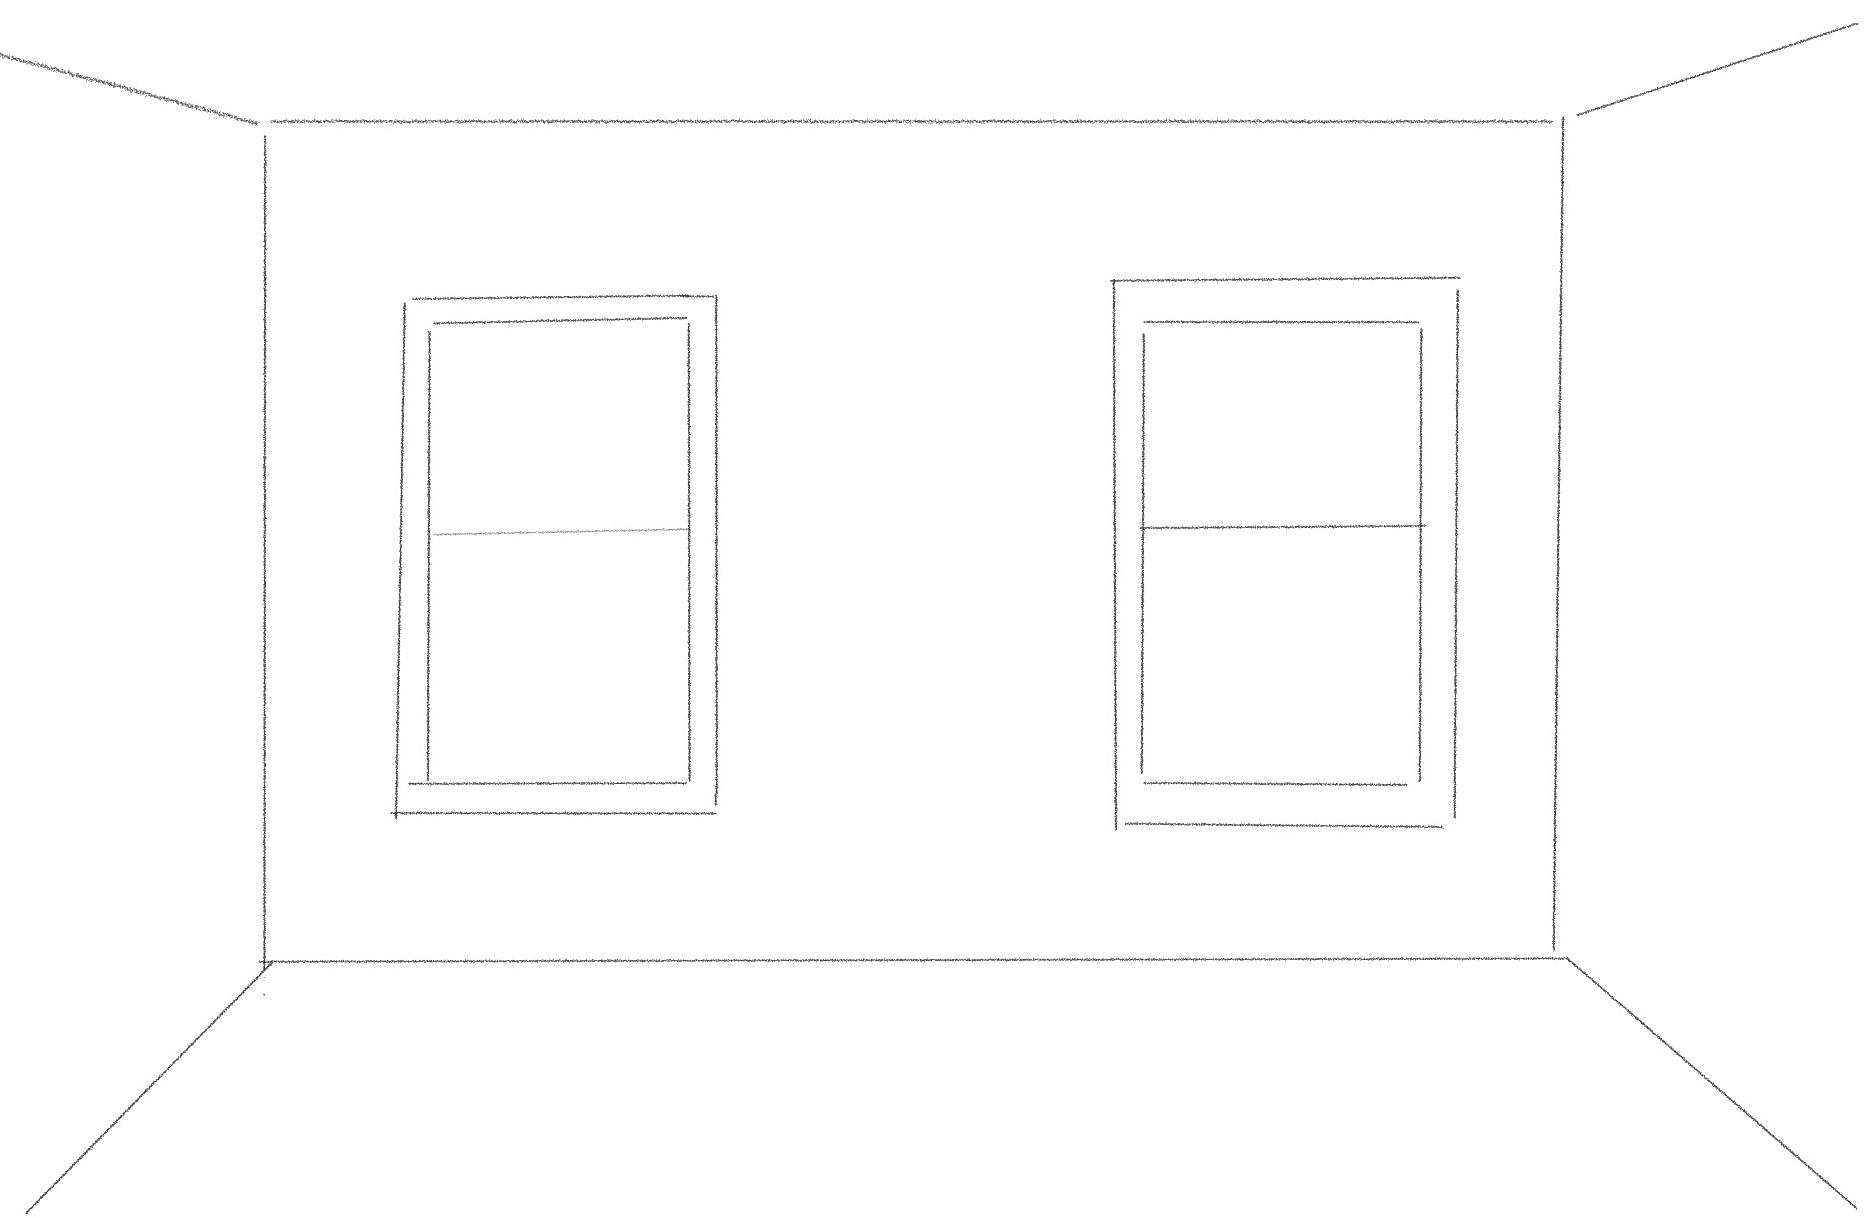
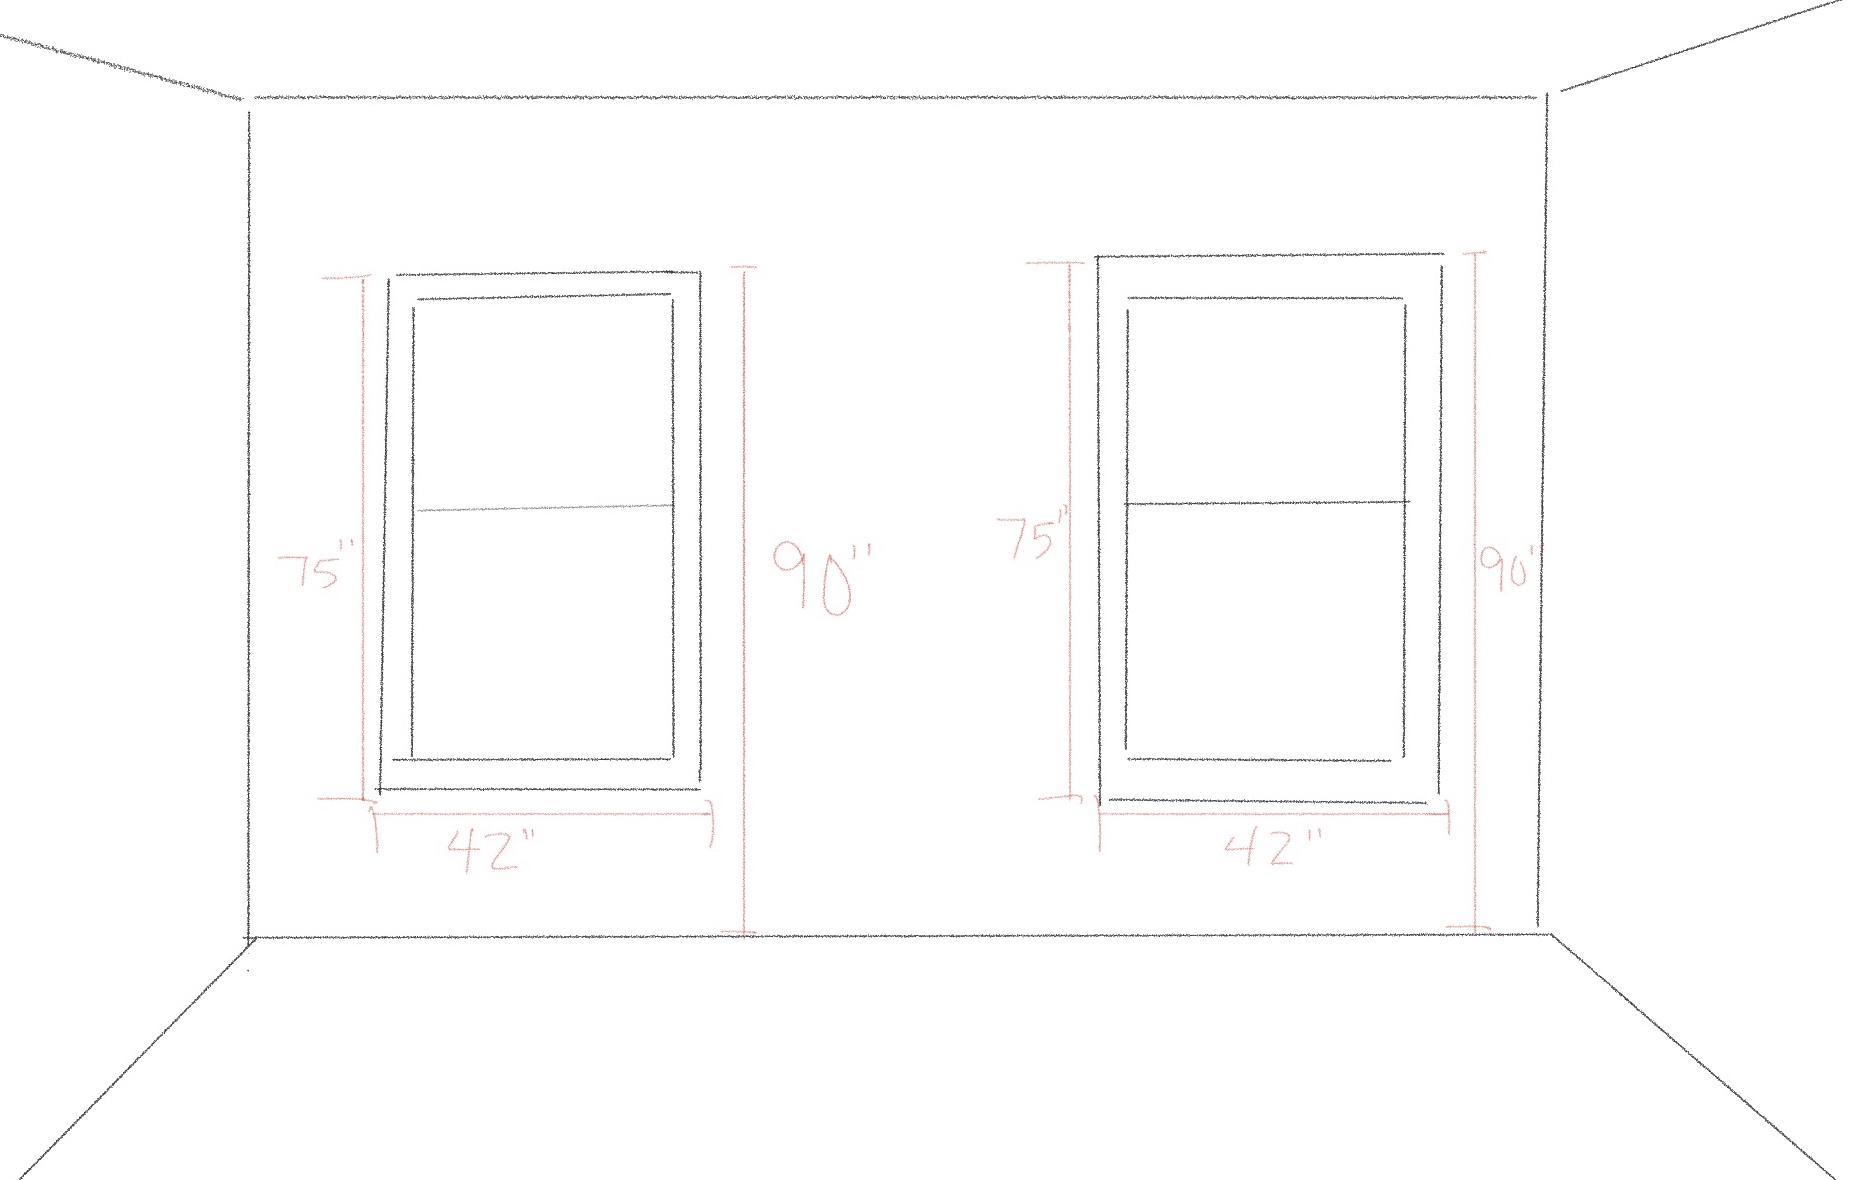
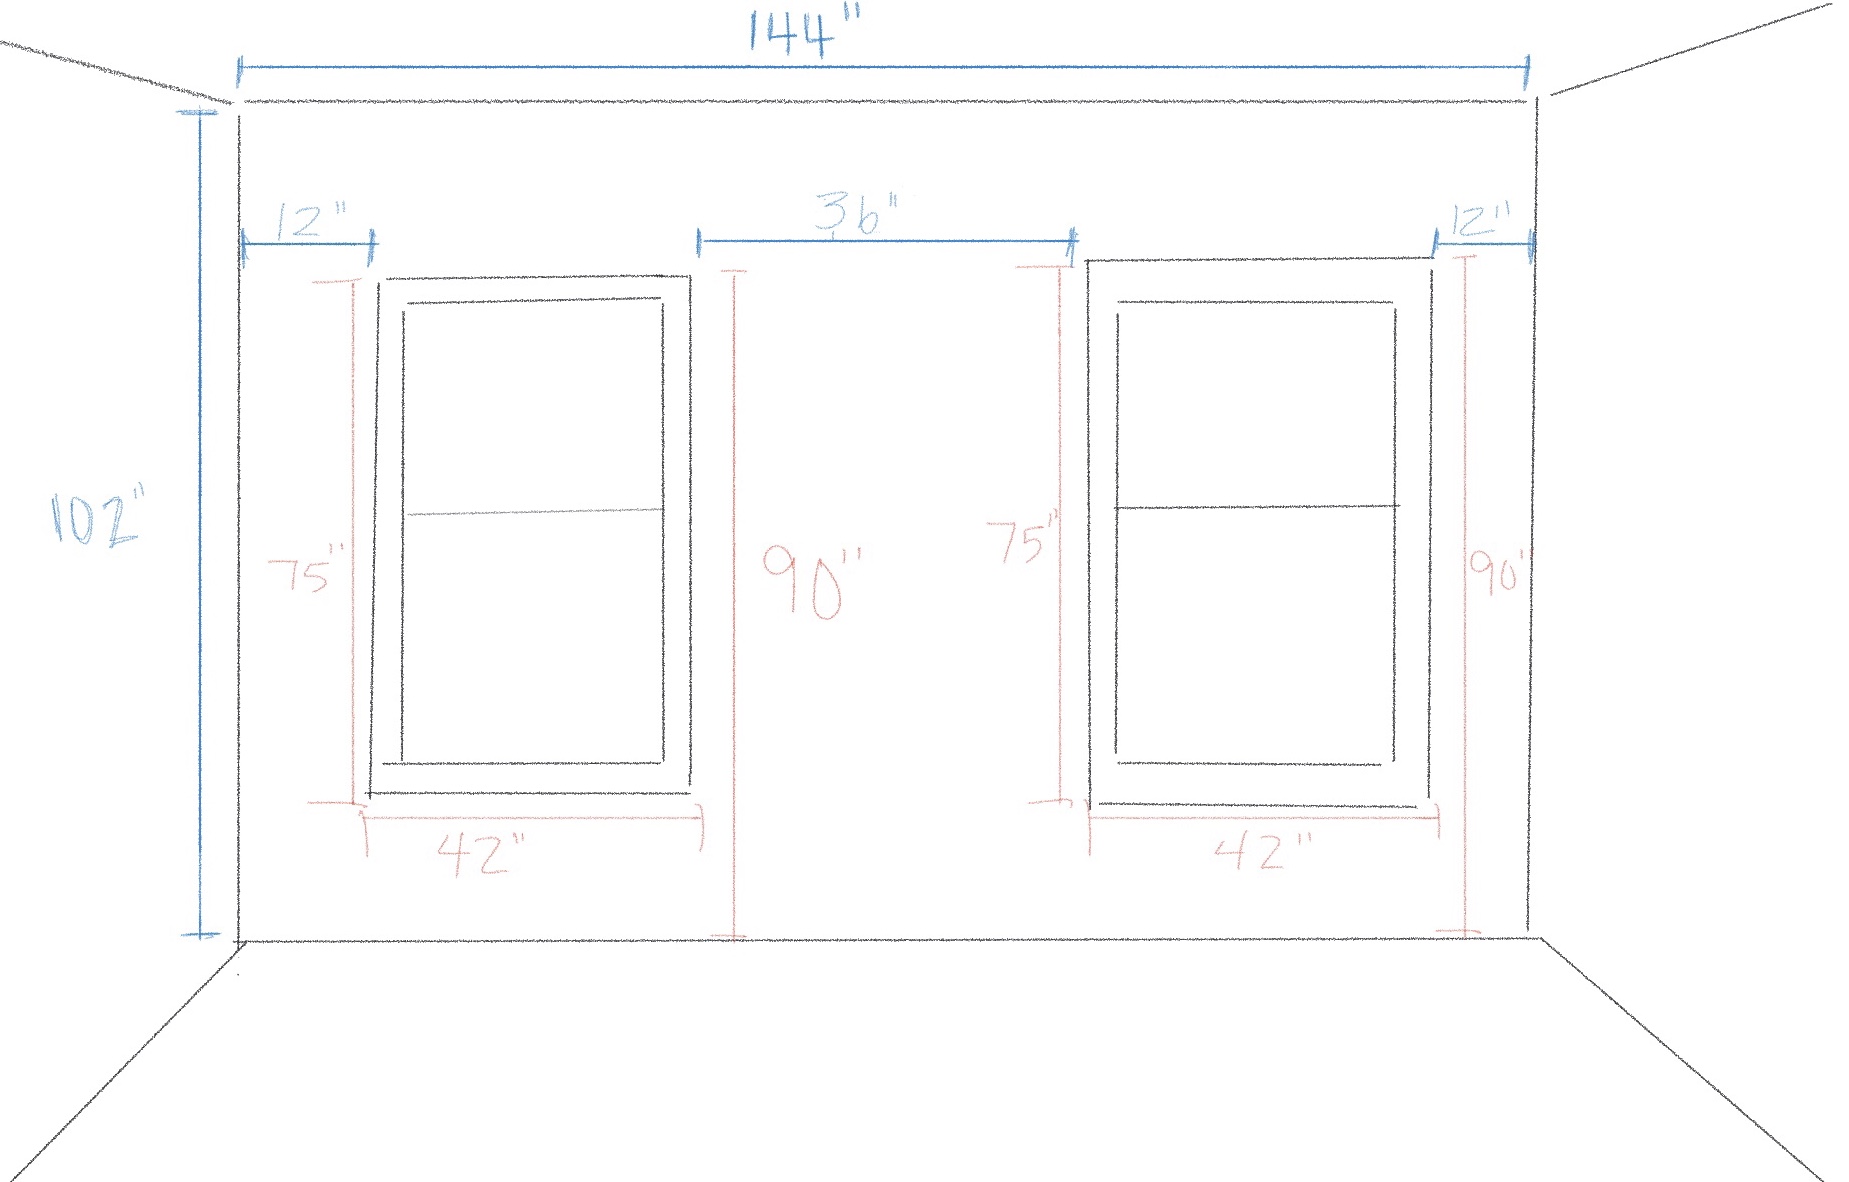
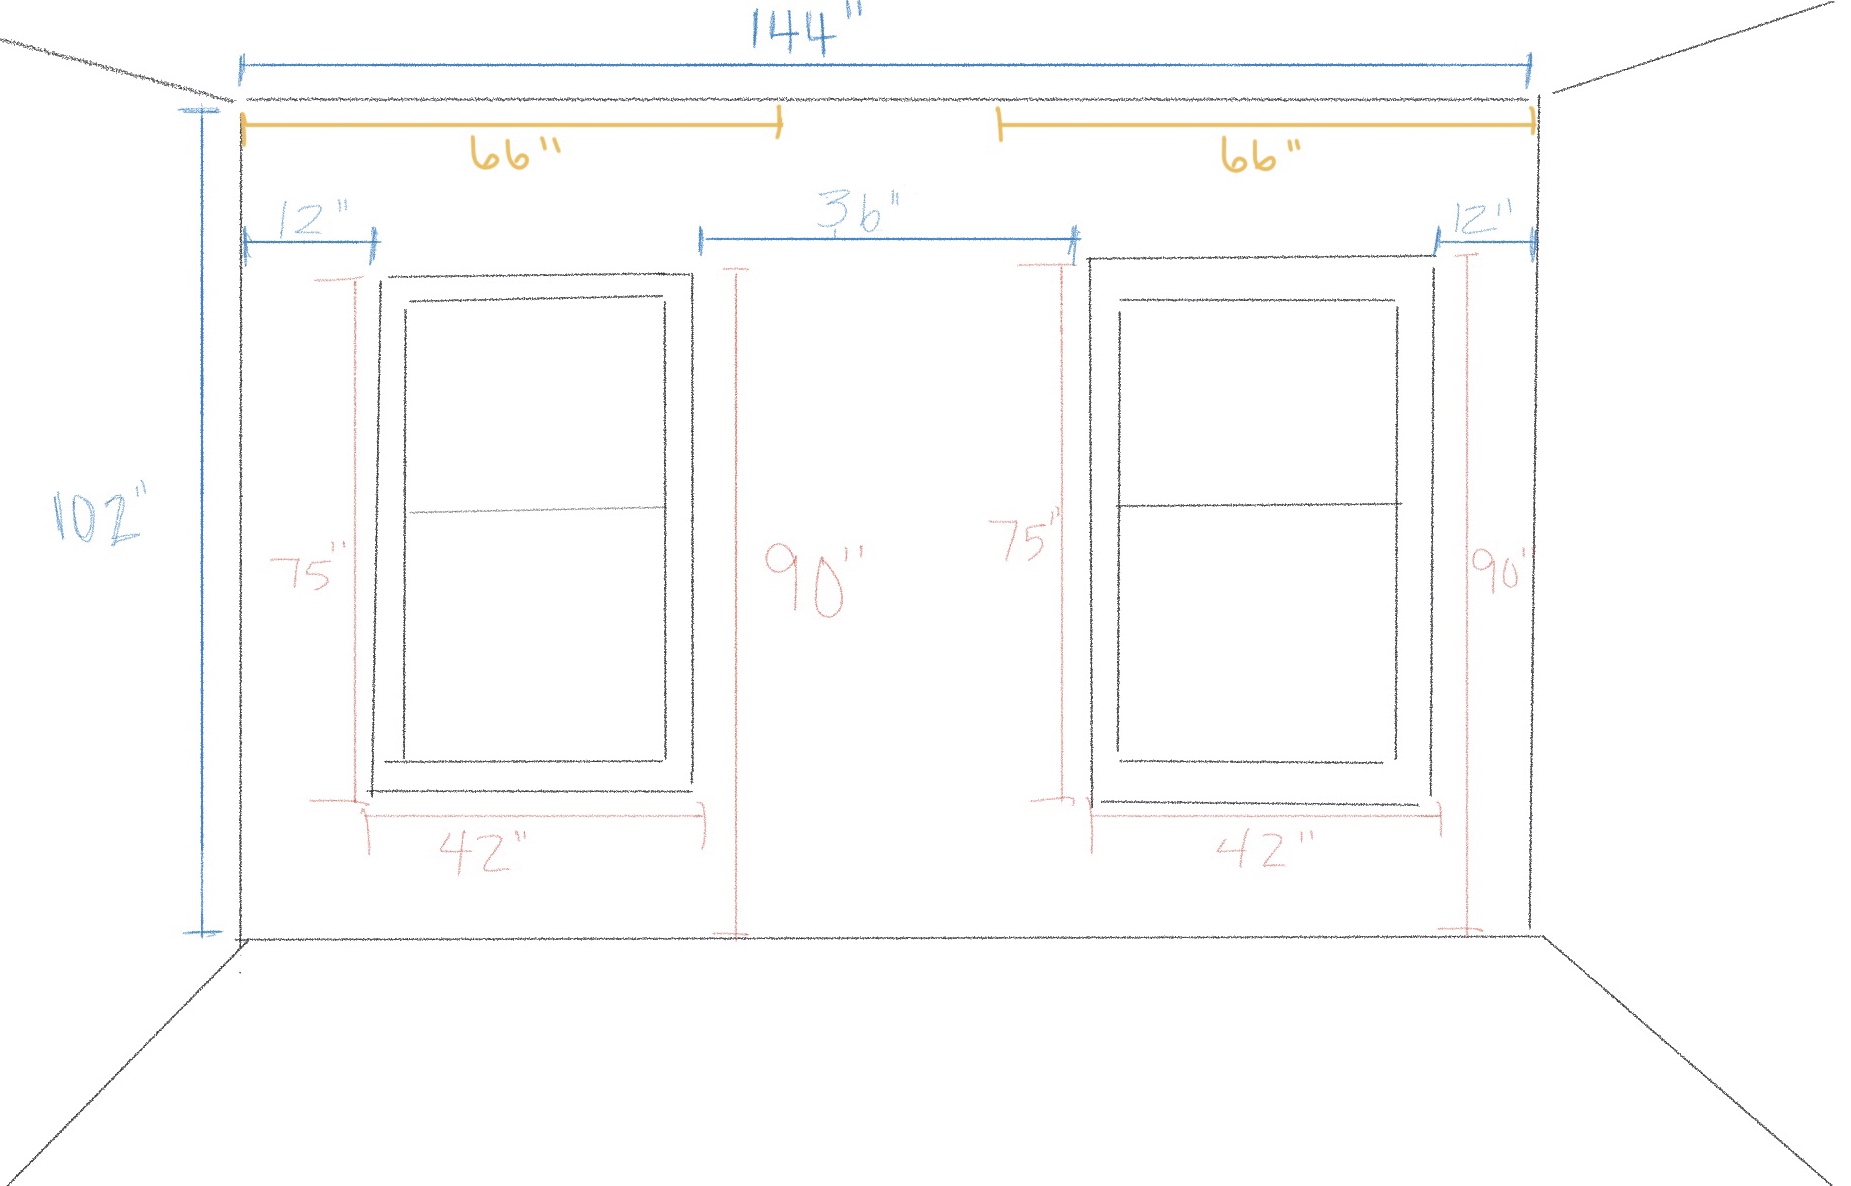
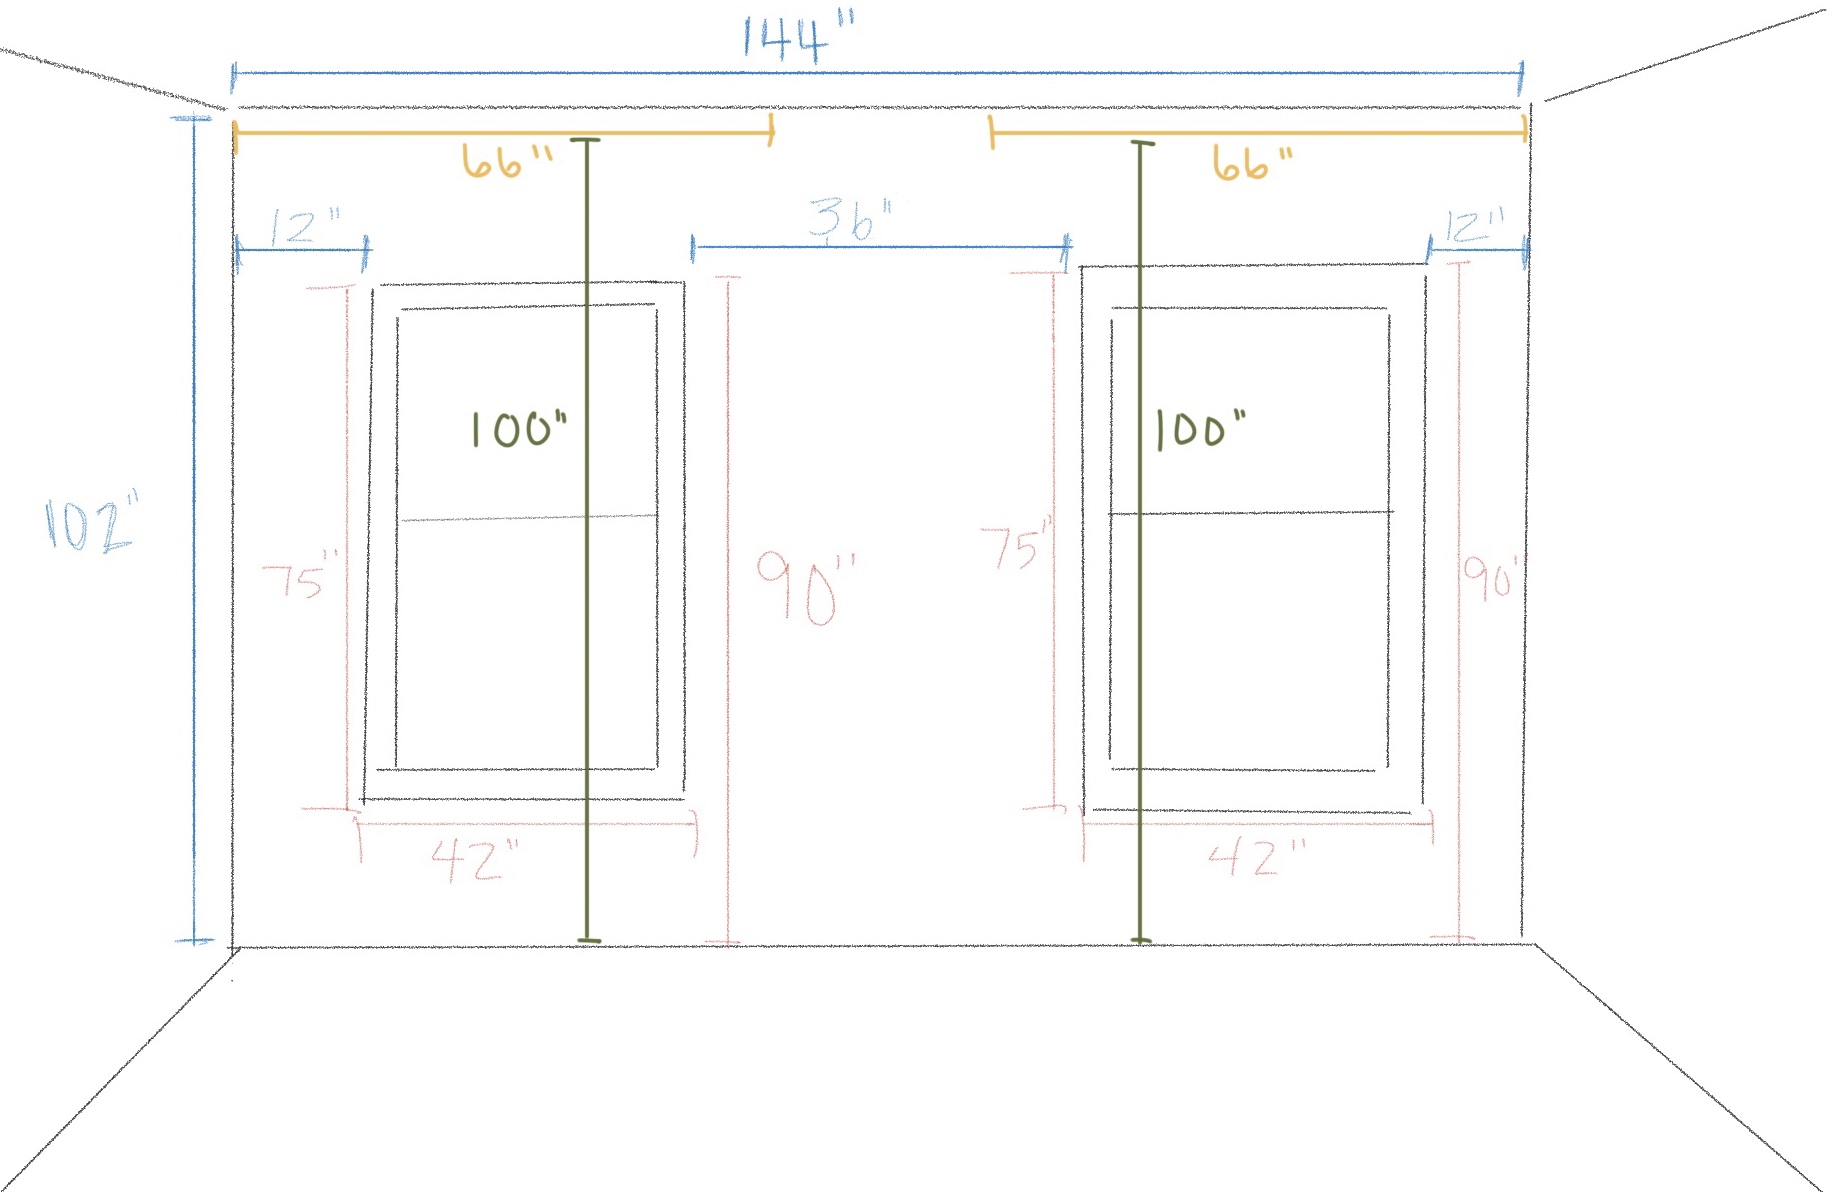
Before you start adding curtains and hardware to your cart, you need to have proper measurements. First, grab a blank piece of paper, a pencil, and a tap measure. You don’t have to be an artist, but it helps to draw a rough diagram of your windows first. Then you can note your measurements on the drawing as you take them. Once you have your tools, get started with these simple steps.
01 | Measure the height and width of the window (and the total height from the floor to the top of the window casing) [ex. Window H = 75”, Window W = 42”, Floor to Top of Window H = 90”]
02 | Measure the height and width of the wall surrounding the window (be sure to include how much space you have between windows, too) [ex. Wall H = 102”, Wall W = 144”, Corner to Window = 12” each, Width Between Windows = 36”]
03 | Add 12” to the width of the window on each side (ex. 42” + 12” + 12” = 66”)
04 | Add 6-12” to your total height (from floor to top of the window) [ex. 90” + 10” = 100”]
05 | Calculate panel width by at least doubling the overall width (ex. 66” x 2 = 132”), but for more dramatic and elegant windows, you can add even more (ex. 66” x 2.5 = 165”)

And that’s it! Follow these steps and never hang draperies wrong again.